Creality Print Download: The Official Free Slicer for Creality 3D Printers
Always the newest version, checked live against the official GitHub releases every time you visit
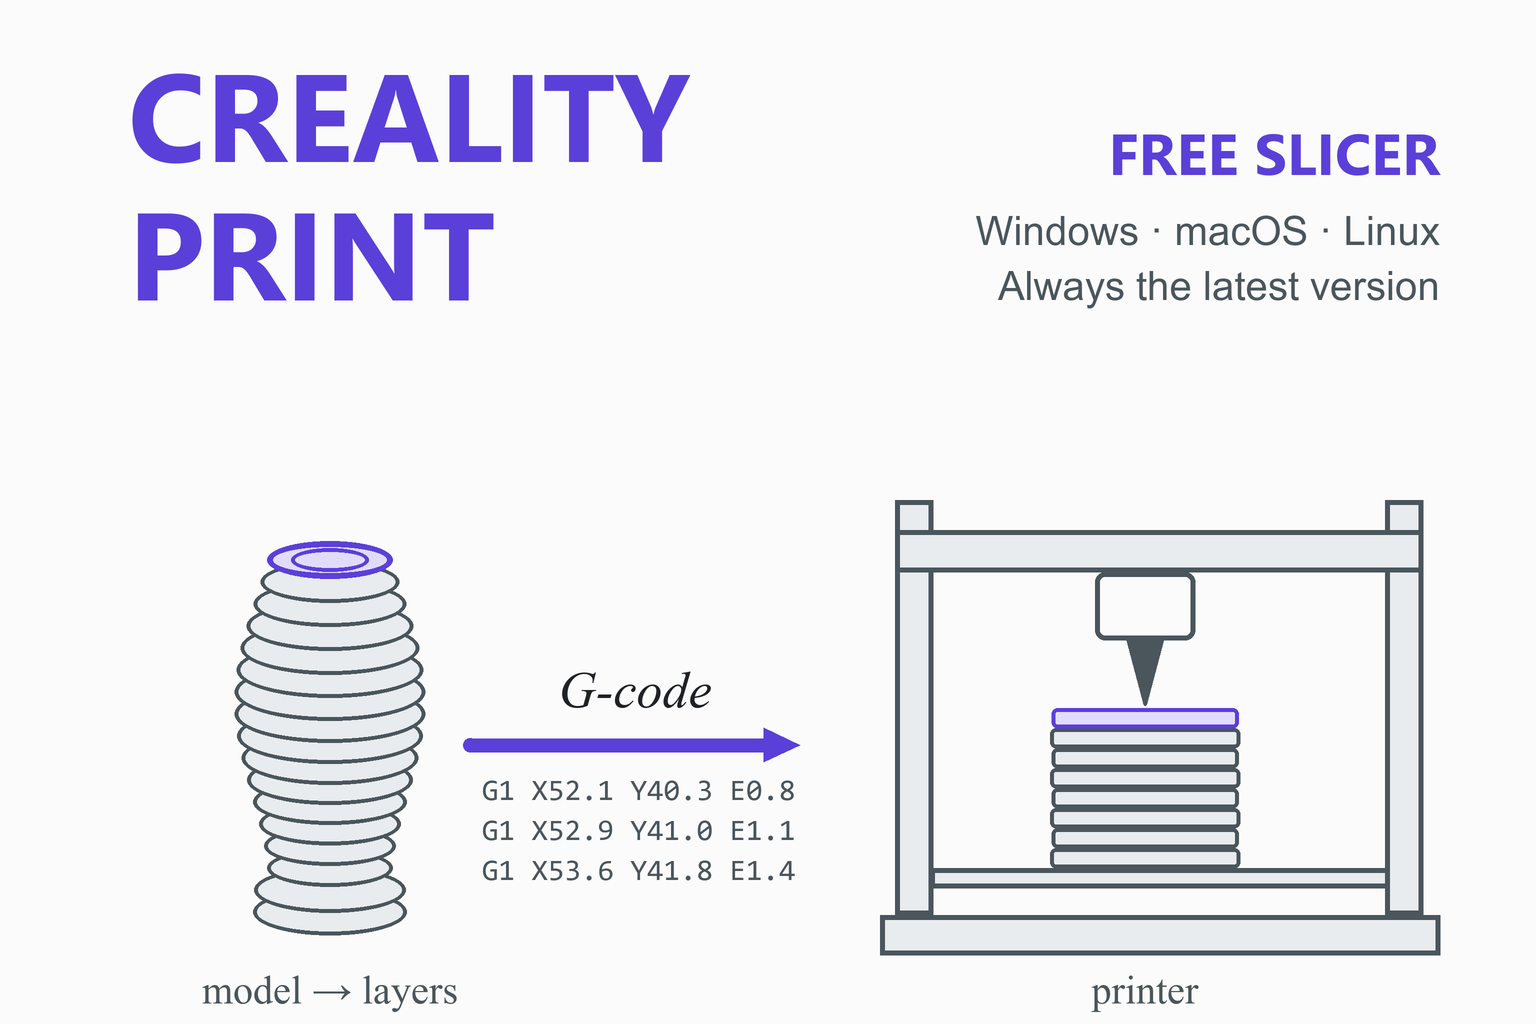
Creality Print is Creality’s free, open-source slicer. It turns a 3D model into the G-code your printer follows, and it can also send the print to a networked printer and monitor it. This page checks GitHub when you open it and offers the newest stable build for Windows, macOS and Linux, with file sizes and SHA-256 checksums so you can confirm the file is genuine. Below the download you will find what changed in version 7, system requirements, installation steps, a first-print walkthrough and honest notes on the strengths and limits of the program.
Download Creality Print
Or use the official page: creality.com Creality Print download
Previous versions
Loading the release list…
How this download box works
- It is live. Each visit asks the GitHub Releases service for the newest stable release of the official
CrealityOfficial/CrealityPrintproject, so you are never sent to an outdated file. Your browser keeps the answer for ten minutes to be polite to GitHub; the Refresh button asks again immediately. - It picks the highest build. A single release can contain several builds of the same version. Creality published version 7.3.0 with three builds each for Windows, macOS and the Linux AppImage (numbered 6149, 6151 and 6157), and the newest build is the one you want. The box compares the build numbers in the file names and chooses the highest; when this article was written, Creality’s own download page named that same build, 6157.
- It hides update packages. Files ending in
.nupkgare packages used by the program’s built-in updater (Windows hot updates were added in version 7.1.1), not installers, so they are not listed. - Every link goes to GitHub. The script only accepts download addresses that begin with the official project’s release path. If GitHub cannot be reached, the box falls back to links that always point to the newest release.
Download Safety and How to Verify the File
Search results for “Creality Print download” include many unofficial sites that host repackaged installers, often with old version numbers and sometimes with bundled extras. Slicers are programs you run with full access to your files, so where the installer comes from matters.
Official GitHub releases
The project’s own release page, which the box above reads from. Each file carries a checksum that GitHub computes.
Creality’s own site
The Creality Print page on creality.com lists the current version and links to older ones.
Avoid the rest
Mirror, “free download” and driver-portal sites add nothing and may bundle unwanted software. Treat them as untrusted.
Check the SHA-256 checksum
A checksum is a fingerprint of the file. If the fingerprint of your download matches the one shown in the box above, the file is exactly what was published. Replace the file name with yours.
Windows (PowerShell)
Get-FileHash .\CrealityPrint_installer.exe -Algorithm SHA256macOS (Terminal)
shasum -a 256 ~/Downloads/CrealityPrint.dmgLinux (terminal)
sha256sum CrealityPrint.AppImageCompare the printed value, character by character, with the SHA-256 shown for that file. If they differ, delete the file and download it again from the official link.
What Is Creality Print?
A slicer is the program between a 3D model and a printer. It cuts the model into thin horizontal layers and works out the path the nozzle should follow for each one, then writes those instructions as G-code. Creality Print is the slicer made by Creality for its FDM (filament) printers. It is free, and its source code is public on GitHub under the GNU Affero General Public License v3.
According to the project’s README, Creality Print is forked from Orca Slicer, which is forked from Bambu Studio, which is forked from PrusaSlicer, which descends from Slic3r. The README also says it incorporates many features from SuperSlicer. If you have used any of those programs, the layout will feel familiar: a 3D plate view, a settings panel with tabs for printer, filament and process, and a preview that shows each layer’s toolpath.
Third-party summaries report that the older Creality Slicer (the 4.x series) was based on Cura and that the current Orca-based generation began with version 5.0. Version 7, the focus of this page, adds a stronger device-management side (printing over the local network or the internet, camera view, filament tracking), an optional AI-assisted mode and a growing set of surface and multi-color features.
Creality Print is made for Creality printers. It ships ready-made profiles for Creality machines. It is not a general replacement for a slicer such as Orca Slicer if you own printers from several brands; see the comparison below.
What’s New in Version 7
Version 7 appeared at the end of 2025 and has had a release roughly every one to two months since. The table below summarises the stable releases from the official release notes, newest first. The download box above shows the very newest one, with a list of its headline changes, so it stays current even as this table ages.
| Version | Date | Main changes |
|---|---|---|
| 7.3.0 | 24 Sep 2026 | Color-matching that picks filament mixes to reproduce model colors; one-click color separation for OBJ models; gradient color control; purge material reused as infill; Adaptive TPMS infill; ZAA (Z anti-aliasing) for smoother curved top surfaces; faster auto-orientation and slicing; experimental multi-nozzle printing for the K3; AI assistant upgrade. |
| 7.2.1 | 4 Aug 2026 | Vietnamese, Indonesian and Thai translations; AI Assistant answers that use your selected printer and filament; 17 more settings covered by AI parameter recommendations. |
| 7.2.0 | 30 Jun 2026 | AI Edition (beta), a guided workflow you can choose at first launch alongside the Professional Edition; color-mixing printing; OBJ import; better print-time estimates; improved support generation; model repair on macOS and Linux. |
| 7.1.1 | 28 Apr 2026 | Windows hot updates (small incremental patches instead of a full reinstall); remaining-filament display for RFID filament in the CFS on the Send and Device pages. |
| 7.1.0 | 30 Mar 2026 | Fuzzy-skin painting; ironing for support interfaces; brim ears; embedding walls into infill; MakeNow integration; G-code preview improvements. |
| 7.0.1 | 31 Jan 2026 | Connect printers through Fluidd. |
| 7.0.0 | 29 Dec 2025 | AI support analysis; layer-line and ringing improvements; new sparse-infill patterns and a Fill Multiline option; prime-tower options; upgraded device page and remote (WAN) camera view; built-in community area with online models and tutorials; better print-time and filament estimates; automatic migration of 6.x presets. |
A few numbers from the 7.3.0 notes are the vendor’s own measurements and worth reading as such: Creality reports that its color-matching algorithm lowered the average color error (ΔE00) in 36 CMYK mixing tests from 8.63 to 2.85, and that reusing purge material as infill cut waste in one example from 199 g to about 29 g. Both figures come from the release notes, not from independent testing.
Key Features
Orca-based engine and calibration
Inherits the Orca Slicer approach, and the README advertises automatic calibration for all printers. The calibration tools are the quickest way to tune a new filament.
Sandwich wall order
A perimeter mode that prints the inner wall, then the outer wall, then another inner wall, described in the README as an improved version of “external perimeters first”. Polyhole conversion for more accurate round holes is also listed.
Klipper and network printing
Klipper support, one-click LAN printing, remote (WAN) printing and manual connection to Fluidd-based hosts, with a device page showing the camera, temperatures and print history.
Multi-color and CFS
Color mixing, color separation of OBJ models, gradients and purge reduction, plus remaining-filament display for RFID spools in Creality’s filament system (CFS).
AI Edition and Professional Edition
At first launch you choose a guided AI-assisted workflow or the full set of professional settings, and you can switch at any time from the top right of the Prepare page.
Surface and infill options
Adaptive TPMS infill, ZAA anti-aliasing for curved top surfaces, fuzzy-skin painting, ironing for support interfaces and brim ears.
Community and online models
Since version 7.0, a community area inside the program lets you browse online models and tutorials without leaving the slicer.
Wide file support
Opens STL, OBJ, STEP and STP models, and 3MF or CXPRJ project files, according to Creality’s quick-start guide.
Who Should Use Creality Print?
- Owners of Creality printers (the K1, K2 and K3 families, Ender and CR series and others) who want profiles that match their machine and a direct path from slicing to printing.
- Anyone using the CFS multi-color system, because filament mapping and remaining-filament display are built in.
- Beginners who prefer a guided start. The AI Edition is aimed at them, and the quick-start guide’s first-run steps are short.
- People who enjoy tuning. Professional Edition exposes the full Orca-style settings, and the calibration tools help you measure rather than guess.
If you run printers from several manufacturers, or a Bambu Lab machine, a slicer built for that ecosystem or a multi-brand slicer will usually serve you better; see the comparison below.
System Requirements
| Item | Requirement |
|---|---|
| Windows | Windows 10 or 11, 64-bit edition (32-bit systems are not supported) |
| macOS | macOS 10.14 or later; separate builds for Apple Silicon and Intel Macs |
| Linux | AppImage (x86_64) and Flatpak (x86_64 and ARM64) files are published on GitHub |
| Memory | 4 GB RAM minimum, 8 GB recommended |
| Graphics | An OpenGL-compatible graphics card |
| Disk space | About 600 MB free (the installers themselves are roughly 170 to 320 MB) |
A note on the sources. Creality’s quick-start guide gives the figures above. Creality’s download page lists Linux builds yet also carries the line “Only supported on Windows and Mac”, so for Linux the GitHub release files are the reliable reference.
Large models, many supports and high-resolution multi-color jobs need more memory than the minimum, so treat 8 GB as the practical starting point.
How to Install Creality Print
Windows
- Download the Windows installer from the box above and, if you want to be sure, check its SHA-256 checksum.
- Run the installer and follow the prompts. If Windows SmartScreen shows a warning, confirm the file came from the official GitHub release and matches the checksum before continuing.
- Keep the install path to plain English letters and digits. The 7.3.0 release notes list a fix for devices that could not be added during setup when the install path contained Chinese characters, and a simple path avoids that class of problem.
- Start the program from the Start menu. Once installed, version 7.1.1 and later can update through small hot-update patches, so you will not need to reinstall for every release.
macOS
- Choose the right build. Open the Apple menu and choose About This Mac: a chip named “Apple M…” needs the Apple Silicon build, and an “Intel” processor needs the Intel (x86_64) build.
- Open the downloaded
.dmgfile and drag Creality Print into the Applications folder. - On first launch macOS may ask you to confirm that you want to open an app downloaded from the internet. Control-click the app and choose Open if the normal double-click is blocked.
Linux
- AppImage (x86_64): make the file executable and run it. Some distributions need FUSE support installed for AppImages to start.
chmod +x CrealityPrint-*.AppImage ./CrealityPrint-*.AppImage - Flatpak (x86_64 or ARM64): install the downloaded file for your user, then start it from your applications menu.
If you need the exact application name for the command line,flatpak install --user ./CrealityPrint-*.flatpakflatpak listshows it.
First-Time Setup and Your First Print
First-run setup
Creality’s quick-start guide describes five steps the first time you open the program:
- Language and region. Choose your language and region.
- Printer model. Select every printer you will use. The guide says at least one must be selected before you can start slicing, and you can add or change printers later in the settings.
- Printer and nozzle. Pick the machine and the nozzle diameter you actually have fitted.
- Filament. Choose the filament type loaded in the printer.
- Print profile. Pick a profile that balances quality and speed. For most prints on a 0.4 mm nozzle the guide suggests a 0.20 mm layer height.
If you are on version 7.2.0 or later, you will also be asked to choose between AI Edition (a guided workflow) and Professional Edition (the full settings). You can switch from the top-right corner of the Prepare page whenever you like.
Slice and print a model
- Import a model. Drag in an STL, OBJ, STEP or STP file, or open a 3MF or CXPRJ project.
- Arrange and orient it. Place it flat on the plate where possible. Good orientation reduces supports and improves strength: layers are weakest between each other, so avoid loading a part in the direction that pulls layers apart.
- Slice. Click Slice plate in the bottom-right corner. The program generates the G-code and switches to Preview.
- Check the preview. Step through the layers, look for gaps, check the estimated time and filament use, and confirm supports appear where overhangs need them.
- Send it. If the printer is on the same network, choose LAN Print, select the printer and use One-click Print. Otherwise choose Export to Local, save the G-code to a folder, SD card or USB drive, put it in the printer and start the print from the printer’s own screen.
Tip: Connect a printer that does not appear automatically through the Device menu: choose Manually Add, then Other, enter the IP address and port, and press Test. This is how Fluidd-based hosts are added (version 7.0.1 and later).
The Settings That Matter Most
Slicers expose hundreds of settings, but a handful decide most of the result. The table gives common starting points; they are general guidance, not Creality specifications, and the profile for your printer and filament should come first. Change one setting at a time so you can see what it did.
| Setting | What it controls | Typical starting point | Trade-off |
|---|---|---|---|
| Layer height | Thickness of each layer | 0.20 mm on a 0.4 mm nozzle (the quick-start suggestion); commonly 25% to 75% of the nozzle diameter | Thinner layers look smoother but take much longer |
| Wall count | Number of outlines around each layer | 2 to 3 for general parts, more for strength | More walls add strength and weight faster than extra infill |
| Sparse infill | Internal fill density and pattern | 10% to 20% for most parts | Higher density adds time and material with diminishing strength gains; Adaptive TPMS (7.3.0) grades density by distance to the surface |
| Top and bottom layers | Solid skin above and below the infill | Enough layers to close the infill gaps cleanly (often 4 to 6 at 0.2 mm) | Too few leaves pinholes; too many wastes time |
| Supports | Temporary structures under overhangs | Normal or tree supports only where needed | Supports use material and leave marks; reorient the part first |
| Speed and acceleration | How fast the head moves | Start with the printer profile | Faster is quicker but can show ringing and weaker layer bonding |
| Brim | Extra rim that helps the part stick | Add for tall, narrow or warp-prone parts | Costs material and needs trimming; brim ears (7.1.0) limit it to the corners |
For a new filament, run the calibration prints before tuning anything else. The README lists automatic calibration for all printers, and the calibration menu in Creality Print follows the Orca Slicer approach (check the exact entries in your installed version). Measuring flow and pressure behavior once is far quicker than adjusting by trial and error across many prints.
Creality Print vs Orca Slicer, Cura, Bambu Studio and PrusaSlicer
The five programs are close relatives, so the right choice depends on your printer more than on any single feature.
| Creality Print | Orca Slicer | Cura | Bambu Studio | PrusaSlicer | |
|---|---|---|---|---|---|
| Made by | Creality | Open-source community | UltiMaker | Bambu Lab | Prusa Research |
| Lineage | Fork of Orca Slicer | Fork of Bambu Studio | Its own code base | Fork of PrusaSlicer | Fork of Slic3r |
| Licence | AGPL-3.0 | AGPL-3.0 | LGPL-3.0 | AGPL-3.0 | AGPL-3.0 |
| Best for | Creality printers and CFS | Many brands, deep tuning | Many brands, huge profile library | Bambu Lab printers | Prusa printers and many others |
| Network printing | Creality devices, Klipper hosts | Several brands | Plugins and cloud | Bambu Lab printers | PrusaLink and OctoPrint |
One third-party review notes that Creality Print tends to trail upstream Orca Slicer in some features and fixes, because it is built on top of it, while offering tighter integration with Creality hardware. If you only own a Creality printer, start with Creality Print; if you own several brands or want the newest upstream features, Orca Slicer is a strong alternative. Our guides to Cura, Bambu Studio, PrusaSlicer and SuperSlicer cover the others in detail.
Pros and Cons
Strengths
- Free and open source, with the code public on GitHub.
- Profiles and device features built for Creality printers.
- Frequent releases, with detailed public release notes.
- Familiar Orca-style interface and calibration approach.
- Windows, macOS (both chip types) and Linux builds.
- Guided AI Edition for beginners, full control for experts.
Limits
- Aimed at Creality hardware; less convenient for mixed-brand workshops.
- Can trail upstream Orca Slicer in some features and fixes (a third-party observation).
- Some features, such as AI assistance and cloud printing, involve a Creality Cloud login.
- Occasional crash and freeze reports appear on user forums; these are anecdotal, and fixes ship regularly.
- Large installers (roughly 170 to 320 MB) and a lot of choices for new users.
- Unofficial download sites make it easy to pick up an old or repackaged copy.
Troubleshooting
| Problem | What to try |
|---|---|
| A security tool flags the installer or the program | Re-download from the official GitHub release and verify the SHA-256 checksum. The 7.3.0 notes mention a fix for firewall false positives after an in-app update, so update to the latest version. |
| Slicing crashes on some processors | The 7.3.0 notes list a fix for crashes on certain multi-threaded processors. Install the newest build before trying other remedies. |
| The printer does not appear in the device list | Check that the computer and printer are on the same network. Use Device, Manually Add and enter the printer’s IP address, then press Test. Host types such as Fluidd are added through the “Other” option. |
| Cannot add devices during setup | Install to a path with plain English characters. Version 7.3.0 fixed a case where a Chinese-character install path blocked this. |
| Window opens partly off-screen on a second monitor | Fixed in 7.3.0 for a 1440p secondary display; update to the latest version. |
| Black or glitching 3D view | Update your graphics driver. The program needs an OpenGL-compatible card. |
| macOS refuses to open the app | Control-click the app and choose Open, and make sure you installed the build that matches your chip. |
| Printing a K3 after updating | Per the 7.3.0 notes, versions earlier than 7.3 no longer support K3 printing, so use 7.3 or later. |
| Your settings after upgrading from 6.x | Version 7.0.0 migrates 6.x user presets automatically; check them once after upgrading. |
Frequently Asked Questions
Is Creality Print free?
Yes. It is free to download and use, and it is open source under the GNU Affero General Public License v3, with the source code public on GitHub.
Is Creality Print safe to download?
The files on the official GitHub release page are published by Creality, and the download box on this page links only to that page. To confirm your copy is unaltered, compare its SHA-256 checksum with the one shown beside the file. Avoid unofficial mirror and “free download” sites, which often host repackaged or outdated installers.
What is the difference between Creality Print and Orca Slicer?
Creality Print is forked from Orca Slicer and tuned by Creality for its own printers: factory profiles, device management and the filament system (CFS). Orca Slicer is a community project that supports many brands and often receives new upstream features first. If you own only Creality printers, Creality Print is the natural start; if you own several brands, Orca Slicer is worth a look.
Which version of Creality Print should I download?
Normally the newest stable version shown in the download box, using the highest build number. Use an older version only for a specific reason, such as a printer or firmware that needs it. For example, the 7.3.0 release notes say versions earlier than 7.3 no longer support K3 printing.
Does Creality Print only work with Creality printers?
It is built for Creality printers and ships profiles for them. Creality does not present it as a multi-brand slicer, so if you also own printers from other makers, use each maker’s slicer or a multi-brand slicer such as Orca Slicer for those machines.
Do I need an account or an internet connection?
Some features use a Creality Cloud login. The 7.2.0 notes say the AI Assistant checks your Creality Cloud login status, and cloud and remote printing need an account. The slicing workflow in Creality’s quick-start guide, which ends with exporting G-code to a local file or printing over your local network, does not mention a login step.
How do I update Creality Print?
From version 7.1.1, Windows supports hot updates, which apply small incremental patches instead of a full reinstall. You can always download the newest installer from the box on this page. Version 7.0.0 migrates user presets from the 6.x series automatically.
What is the AI Edition?
Introduced in version 7.2.0 (beta), the AI Edition is a guided workflow that helps with model discovery, preparation, risk checks, parameter recommendations and printing. At first launch you choose between it and the Professional Edition, which keeps the full set of settings, and you can switch at any time from the top right of the Prepare page.
Can I print without connecting my printer?
Yes. Choose Export to Local after slicing, save the G-code to a folder, SD card or USB drive, put it in the printer and start the print from the printer’s own screen. LAN printing is the other option when the printer is on the same network.
Which file types can Creality Print open?
According to Creality’s quick-start guide it imports STL, OBJ, STEP and STP models, and it opens 3MF and CXPRJ project files.
More slicer guides: Orca Slicer · Cura · Bambu Studio · PrusaSlicer · SuperSlicer · Engineering calculators