
Blender for 3D Printing: Download, Install and the 3D-Print Toolbox
The free 3D creation suite, with its checksums and requirements, and the free extension that finds and fixes the faults that stop a mesh from printing
Blender is free, open-source software for modelling, sculpting, animating and rendering in 3D. It is also a very good tool for preparing models for 3D printing, because it can edit the triangle meshes that STL files contain, and because its free 3D-Print Toolbox extension checks a mesh for the problems slicers complain about, repairs the common ones and exports an STL, PLY or OBJ file at the right size. This guide gives you the official download with the version Blender shows today, the file sizes and SHA-256 checksums, the system requirements and install steps, and then walks through setting up Blender and the toolbox for printing. Blender has no download feed that a web page can read, so the versions are dated here and the page always sends you to the official download page.
Download Blender
All releases, with checksum files: download.blender.org/release
| System | Files on the download page | Requirement |
|---|---|---|
| Windows (64-bit) | Installer (.msi), 348 MB Portable (.zip), 386 MB Microsoft Store | Compatible with Windows 11, 10 and 8.1 |
| Windows on Arm | Installer, 227 MB Portable (.zip), 261 MB | Windows on an Arm computer |
| macOS | Apple Silicon (.dmg), 330 MB | macOS 13 (Ventura) or newer, Apple Silicon only |
| Linux | Archive (.tar.xz), 366 MB Snap Store | A distribution with glibc 2.28 or newer |
| Steam | Blender on Steam, 366 MB | The Steam client |
Which version?
- Blender 5.2 LTS is the version the download page offers. The 5.2 series first shipped on 14 July 2026, is branded LTS (long-term support) with two years of updates, and had reached 5.2.2 on 15 September 2026. The download page does not offer a separate stable and LTS build: they are the same file.
- Blender 4.5 LTS is the other maintained long-term release (4.5.14 on 15 September 2026). It is the last release that runs on Intel Macs: Blender 5.0 and later need Apple Silicon and macOS 13 or newer, so an Intel Mac user needs 4.5 LTS from the LTS page.
- Blender 5.3 was listed as upcoming, expected on 10 November 2026, with a beta in the daily builds. If it has been released when you read this, the download page will show it; for printing work either version is fine, and the extension below supports Blender 4.2 LTS and newer.
SHA-256 checksums for Blender 5.2.2
A checksum is a fingerprint of the file. These are the values from the official checksum file for the release. If your download’s fingerprint matches, the file is exactly what Blender published.
| File | SHA-256 |
|---|---|
| blender-5.2.2-windows-x64.msi | 8dac2751ebe8e3867327eec52f1ef9b344c0a27499bb6221a301b4b35f2828d1 |
| blender-5.2.2-windows-x64.zip | 3849d17a682cba006075aaa3f3597ecb5c9c30ec31035b2e092c53e40679b535 |
| blender-5.2.2-macos-arm64.dmg | dc4125399b8bfefe283cc1624d6cfc7809d1cac20ace51072127eb371f31f210 |
| blender-5.2.2-linux-x64.tar.xz | 84098912789dc450e95697c4184fb8a90acbe5111c2ba4aede3fecb57806a168 |
Windows (PowerShell)
Get-FileHash .\blender-5.2.2-windows-x64.msi -Algorithm SHA256macOS (Terminal)
shasum -a 256 blender-5.2.2-macos-arm64.dmgLinux (terminal)
sha256sum blender-5.2.2-linux-x64.tar.xzHow to download it safely
- Start from blender.org. Use the button above or the Microsoft Store, Steam or Snap Store entries that the download page itself links. Avoid mirror and “free download” sites, which can offer out-of-date or repackaged installers.
- Check the fingerprint against the table above or the checksum file next to the release on download.blender.org.
What Blender Is, and What It Is Not
Blender is a mesh modeller: you build a shape from vertices, edges and faces, by pushing and pulling them, extruding, sculpting or adding modifiers. That makes it excellent for organic shapes, figurines, props and for repairing or reshaping models you downloaded. It is licensed under the GNU General Public License (the Blender site says binaries are distributed under GPL version 3 or later), and what you create with it is yours.
| You want… | Good choice |
|---|---|
| Organic shapes, characters, sculpting, reshaping or repairing a mesh | Blender |
| Parts with exact dimensions that you can change later (brackets, enclosures, gears) | A parametric CAD program: see the FreeCAD guide |
| To fix a downloaded STL quickly without modelling | The 3D-Print Toolbox below, or MeshLab |
| Parts described by code, where changing a number rebuilds the model | OpenSCAD, a script-based CAD program |
Blender does not slice: after exporting an STL you still open it in a slicer such as Orca Slicer, PrusaSlicer or Cura.
System Requirements
| System | Minimum | Recommended |
|---|---|---|
| Windows | Windows 8.1 (64-bit); 4 cores with SSE4.2; 8 GB of memory; a graphics card with 2 GB of video memory and OpenGL 4.3 or Vulkan 1.3 | Windows 11; 8 cores; 32 GB of memory; 8 GB of video memory |
| Linux | A 64-bit distribution with glibc 2.28 or newer; the same CPU, memory and graphics minimums as Windows | 8 cores; 32 GB of memory; 8 GB of video memory |
| macOS | macOS 13 (Ventura) on Apple Silicon; 8 GB of memory | macOS 26 (Tahoe) on Apple Silicon; 32 GB of memory |
Blender’s requirements page also asks for OpenGL 4.3 or newer with two named extensions, lists the supported graphics families (NVIDIA GeForce 900 series and newer, AMD GCN 4th generation and newer, Intel Kaby Lake and newer), recommends a screen of at least 1920 × 1080 and says a three-button mouse is recommended, although a two-button mouse or a trackpad works. For simple printing work a modest computer is enough.
Install Blender
Windows
Run the .msi installer and follow the prompts, or use the Microsoft Store or Steam. The .zip is the portable version: extract it anywhere and start Blender from the folder, with nothing installed.
macOS
Open the .dmg and drag Blender to your Applications folder. If macOS asks, confirm that you want to open an app downloaded from the internet, once you have checked the file came from blender.org.
Linux
Extract the .tar.xz archive, which contains the program in a folder, and start Blender from there, or install it from the Snap Store. Any distribution with glibc 2.28 or newer can run the archive.
Set Up Blender for 3D Printing: Units
A slicer reads the numbers in an STL file as millimetres, and the toolbox’s own description of its export says that most slicers assume millimetres. Blender, on the other hand, works in “Blender units” and shows them according to the scene’s unit settings, so a model can arrive in the slicer 1,000 times too big or too small unless you set the units deliberately.
- Open the unit settings: Properties editor, Scene tab, Units panel. The manual describes Unit System (None, Metric or Imperial), Unit Scale (the factor used to convert between Blender’s internal units and the values you see), and Length (the unit shown for lengths).
- Choose how you will read the numbers. Many people pick Metric, set the Unit Scale to 0.001 and Length to millimetres so that one Blender unit is one millimetre on screen. That is a common way of working, not something the manual prescribes; the manual notes that the unit scale changes what you see in the interface and not how things behave internally.
- Let the export convert for you. The 3D-Print Toolbox has an Export Units option (None, Centimeters, Millimeters or Micrometers) that exports at the unit scale you choose, and Blender’s own STL export has Scale and Scene Unit options. Whichever you use, check the size in your slicer before you print.
Install the 3D-Print Toolbox
The 3D-Print Toolbox is a free extension, listed on extensions.blender.org, for Blender 4.2 LTS and newer. Its page shows version 1.4.1, released on 5 August 2026, under the GNU General Public License v3 or later. It was originally written by Campbell Barton and is maintained by Mikhail Rachinskiy. Its page summarises it as three groups of tools: analysing the mesh and fixing bad geometry with Make Manifold, editing tools (hollowing, aligning to the bed, scaling) and a quick export to STL, PLY or OBJ.
- Open the preferences: Edit, Preferences (Ctrl + comma).
- Allow online access if it is off: Preferences, System, Network, “Allow Online Access”. Blender needs it to reach the extensions site.
- Go to Get Extensions, search for “3D-Print Toolbox” and click Install. (Without internet access you can download the extension’s .zip from its page and use “Install from Disk”.) The extension asks for permission to write files, which it uses to export STL, PLY and OBJ files.
- Find the panel: in the 3D Viewport, press N to open the sidebar and look for the 3D Print tab. It appears in Object Mode and in Edit Mode of a mesh, with the sub-panels Analyze, Clean Up, Edit and Export. The same tools are in the 3D Print Toolbox submenu of the Object menu and, in Edit Mode, of the Mesh menu.
Older tutorials describe an older add-on. Before Blender 4.2 the same tools were a bundled add-on switched on under Preferences, Add-ons, with a tab called “3D-Print” and some different check names. The Blender manual no longer has a page for the extension, so this guide follows the extension’s own page and source code for version 1.4.1; if your version differs, the names may too.
From Model to STL, Step by Step
- Select your mesh object and open the 3D Print tab in the sidebar.
- Measure it. In Analyze, Statistics has Volume and Area buttons that report the volume and the surface area of the active mesh. A mesh with holes or inside-out faces will give a poor volume, which is itself a warning.
- Run the checks. Press Check All, or the individual buttons, and read the Result box (see the table below). In Edit Mode, clicking a result selects the geometry that caused it, so you can see where the fault is.
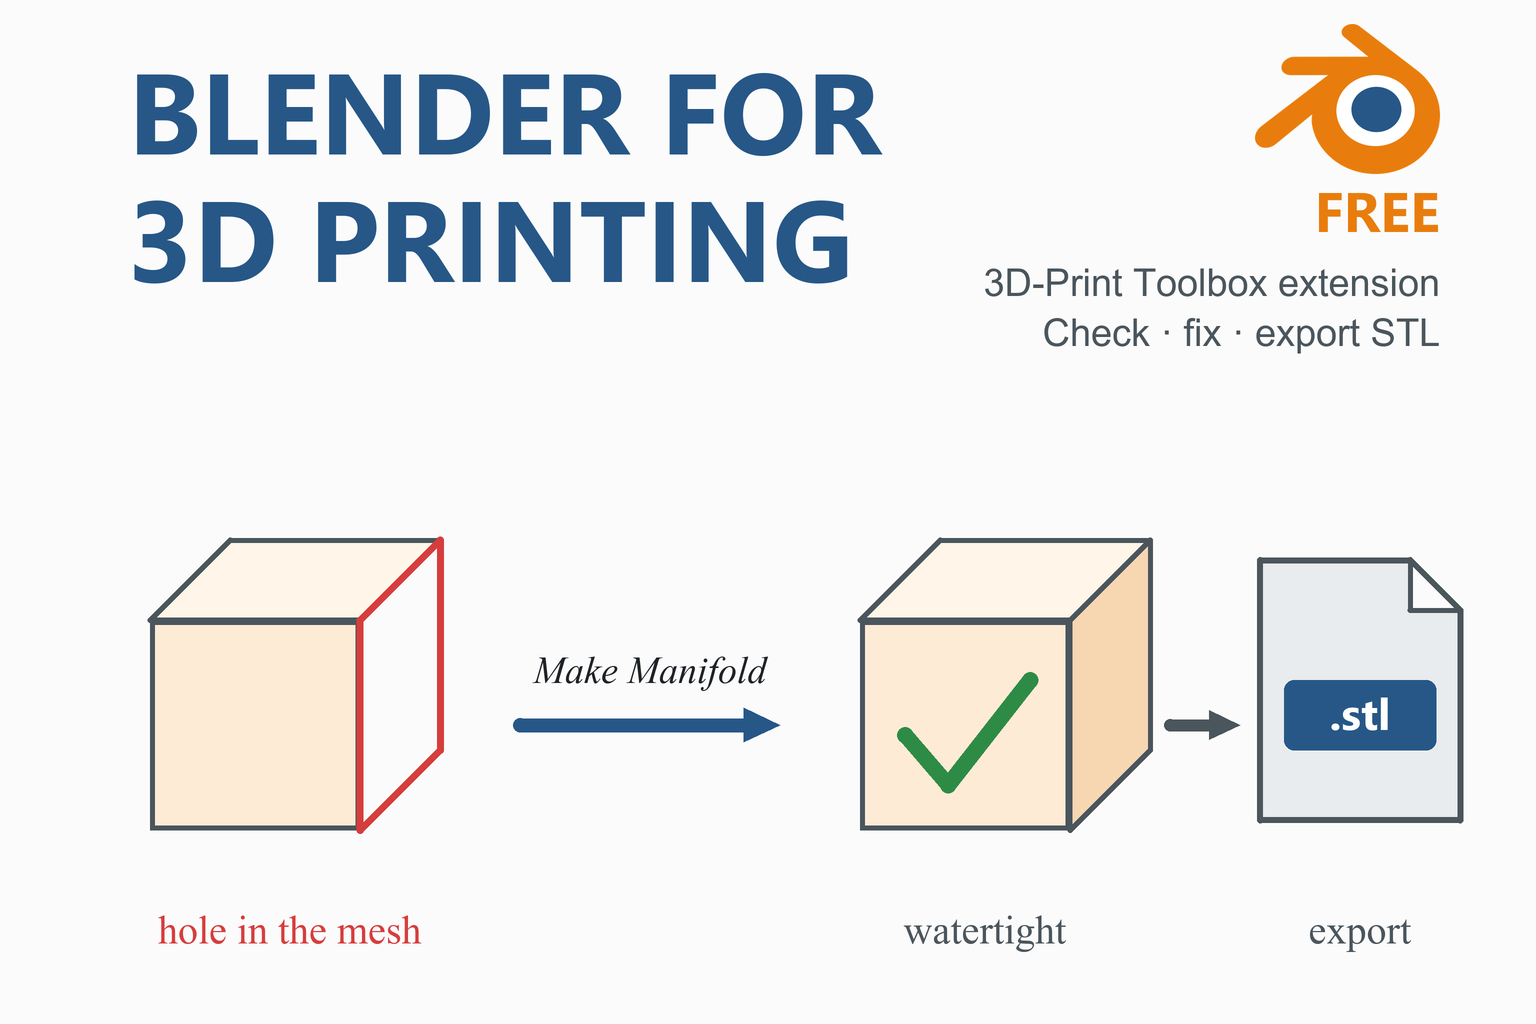
- Fix the common faults. In Clean Up, Make Manifold removes loose geometry and interior faces, merges duplicate vertices, fills holes and recalculates the normals so they point outward. Then run the checks again.
- Deal with what is left by hand. Select the problem areas (Select, Select All by Trait, Non Manifold), patch them, and use Mesh, Normals, Recalculate Outside (Shift + N) if faces still point the wrong way.
- Check the size. If the printed part has to be a particular size, use the Edit tools Scale To Volume or Bounds, or check the dimensions against your units.
- Export. In the Export sub-panel choose the directory, the format (STL, PLY or OBJ) and, under Options, the units, then press Export. The files are named after the blend file and the object, and the objects you selected are exported with their modifiers applied. Alternatively use File, Export, STL (.stl).
- Open the file in your slicer and check that the size and shape are what you expect before you slice.
What the checks mean
| Check | What it looks for (from the extension) |
|---|---|
| Solid | Whether the geometry is solid, with a valid inside and outside and correct normals. It reports non-manifold edges and bad contiguous edges. |
| Intersections | Faces that cut through other faces of the same mesh (self-intersections). |
| Shells | Counts the separate pieces (islands) of the mesh. Shown in Blender 4.3 and newer. |
| Degenerate | Zero-area faces and zero-length edges, below a limit you can set (default 0.0001). |
| Non-Planar | Faces that are not flat, beyond an angle limit (default 5°). |
| Thickness | Walls thinner than a minimum thickness that you set. |
| Sharp | Edges sharper than an angle (default 160°). |
| Overhang | Faces that overhang by more than an angle (default 45°), which may need support. |
The Blender 4.1 manual, which describes the old add-on, explains why the Solid check matters: for a slicer the mesh must be “watertight”, with the surface closed everywhere, and every edge must connect to exactly two faces; an edge with one face is a hole, and an edge with more than two is also not allowed. It adds that some slicers can cope with intersections and overhangs, so those are not always faults to fix.
The other edit tools
- Hollow creates an offset surface, to make a model hollow. Its options include the direction (inside by default), the offset and the voxel size.
- Bisect (Blender 4.5 and newer) cuts the geometry along a plane.
- Align XY rotates the object so that the faces you selected lie, on average, parallel to the XY plane, which is the print bed.
- Scale To Volume and Scale To Bounds scale the selected objects to a set volume or to fit a maximum length.
Blender’s Own STL Export
You do not need the toolbox to export. In Blender 5.2, File, Export, STL (.stl) has these options, according to the manual:
- Format ASCII: off by default, which gives the smaller binary format.
- Include, Selection Only: export only the selected objects (off by default).
- Scale and Scene Unit: multiply the size, and apply the scene’s unit scale to the exported data.
- Forward and Up axes (Blender uses Y forward and Z up).
- Apply Modifiers (on by default), with a Properties choice of Viewport or Render settings in 5.2.
If the model has a modifier such as Subdivision or Array, its result is what is exported, so check the exported file rather than trusting the viewport.
Troubleshooting
| Problem | What to try |
|---|---|
| The slicer says the model is not manifold or has holes | Run Check All and Make Manifold, patch what is left, recalculate the normals outward and check again. If the model came from elsewhere, MeshLab has its own repair filters. |
| The model is 1,000 times too big or too small in the slicer | A unit mismatch. Check the scene’s Unit System, Unit Scale and Length, and set the Units option in the toolbox export (or Scale and Scene Unit in Blender’s export). |
| The 3D Print tab is missing | Check that the extension is installed and enabled, that you are in Object Mode or Edit Mode of a mesh object, and that your Blender is 4.2 or newer. |
| Blender cannot reach the extensions site | Turn on “Allow Online Access” in Preferences, System, Network, or download the extension’s .zip and use “Install from Disk”. |
| The exported STL looks different from the viewport | Modifiers are applied on export, and the exporters can use viewport or render settings depending on the version. Open the exported file in a viewer or slicer to check it. |
| Blender will not run on your Mac | Blender 5.0 and later need Apple Silicon and macOS 13 or newer. On an Intel Mac, use Blender 4.5 LTS. |
Frequently Asked Questions
Is Blender free?
Yes. Blender is free, open-source software. The Blender site says it is released under the GNU General Public License, with binaries distributed under version 3 or later, and that what you create with it is your own property.
Where do I download Blender safely?
From blender.org: the download page offers the Windows installer and portable zip, the Microsoft Store and Steam versions, the macOS disk image and the Linux archive and Snap, and every release with its checksum file is on download.blender.org. Compare the SHA-256 of your file with the one in the checksum file, and avoid third-party sites that repackage installers.
What is the latest version of Blender?
When this guide was checked, on 18 October 2026, the download page offered Blender 5.2.2 LTS, released on 15 September 2026, and listed Blender 5.3 as upcoming, expected on 10 November 2026. The download page always shows the current one.
Does Blender run on an Intel Mac?
Not in version 5. Blender’s requirements page says that Blender 4.5 LTS is the last release to support Intel Macs, and that Blender 5.0 and later need Apple Silicon running macOS 13 (Ventura) or newer. On an Intel Mac, use Blender 4.5 LTS from the long-term support page.
What are the system requirements for Blender?
For Blender 5.2 the minimum on Windows is Windows 8.1 (64-bit), a 4-core CPU with SSE4.2, 8 GB of memory and a graphics card with 2 GB of video memory and OpenGL 4.3 or Vulkan 1.3; Linux needs glibc 2.28 or newer; macOS needs macOS 13 on Apple Silicon. Blender recommends 8 cores, 32 GB of memory and 8 GB of video memory, and a screen of at least 1920 × 1080.
Can I use Blender for 3D printing?
Yes. Blender can model, sculpt and repair the triangle meshes that STL files contain, and its free 3D-Print Toolbox extension checks them for printing faults, repairs many of them and exports STL, PLY or OBJ files. It is a mesh modeller rather than parametric CAD, so for parts with exact, editable dimensions a CAD program such as FreeCAD may suit better.
What is the 3D-Print Toolbox and how do I install it?
It is a free extension for Blender 4.2 LTS and newer, listed on extensions.blender.org. Install it from Edit, Preferences, Get Extensions (turn on “Allow Online Access” under System, Network first), search for 3D-Print Toolbox and click Install. Its panel then appears in the 3D Viewport sidebar (press N) under the 3D Print tab.
How do I make a model manifold in Blender?
With the 3D-Print Toolbox, select the object, open the 3D Print tab and run Check All, then use Clean Up, Make Manifold, which removes loose geometry and interior faces, merges duplicate vertices, fills holes and recalculates the normals outward. Run the checks again. What is left can be fixed by hand: select the problem geometry with Select, Select All by Trait, Non Manifold, and use Mesh, Normals, Recalculate Outside for flipped faces.
How do I export an STL from Blender at the right scale?
Slicers read STL numbers as millimetres. Set the scene units deliberately (Properties, Scene, Units), then export either with the 3D-Print Toolbox, whose Units option exports at the unit scale you choose, or with File, Export, STL, using its Scale and Scene Unit options. Open the exported file in your slicer and check its size before you print.
Is Blender better than FreeCAD for 3D printing?
They are different tools. Blender is best for organic shapes, sculpting and reshaping or repairing meshes. FreeCAD is parametric CAD, better for mechanical parts with exact dimensions that you want to change later. Many people use both: design the part in CAD, and use Blender for artistic work or for repairing a mesh.
More guides: FreeCAD · MeshLab (repair an STL) · Orca Slicer · PrusaSlicer · Cura · Creality Print · Anycubic Slicer Next · ElegooSlicer · QIDI Studio · Engineering calculators