
Raspberry Pi Imager Download: Prepare the SD Card for Your 3D Printer Host
The official free tool from Raspberry Pi, with the newest version checked live against its GitHub releases
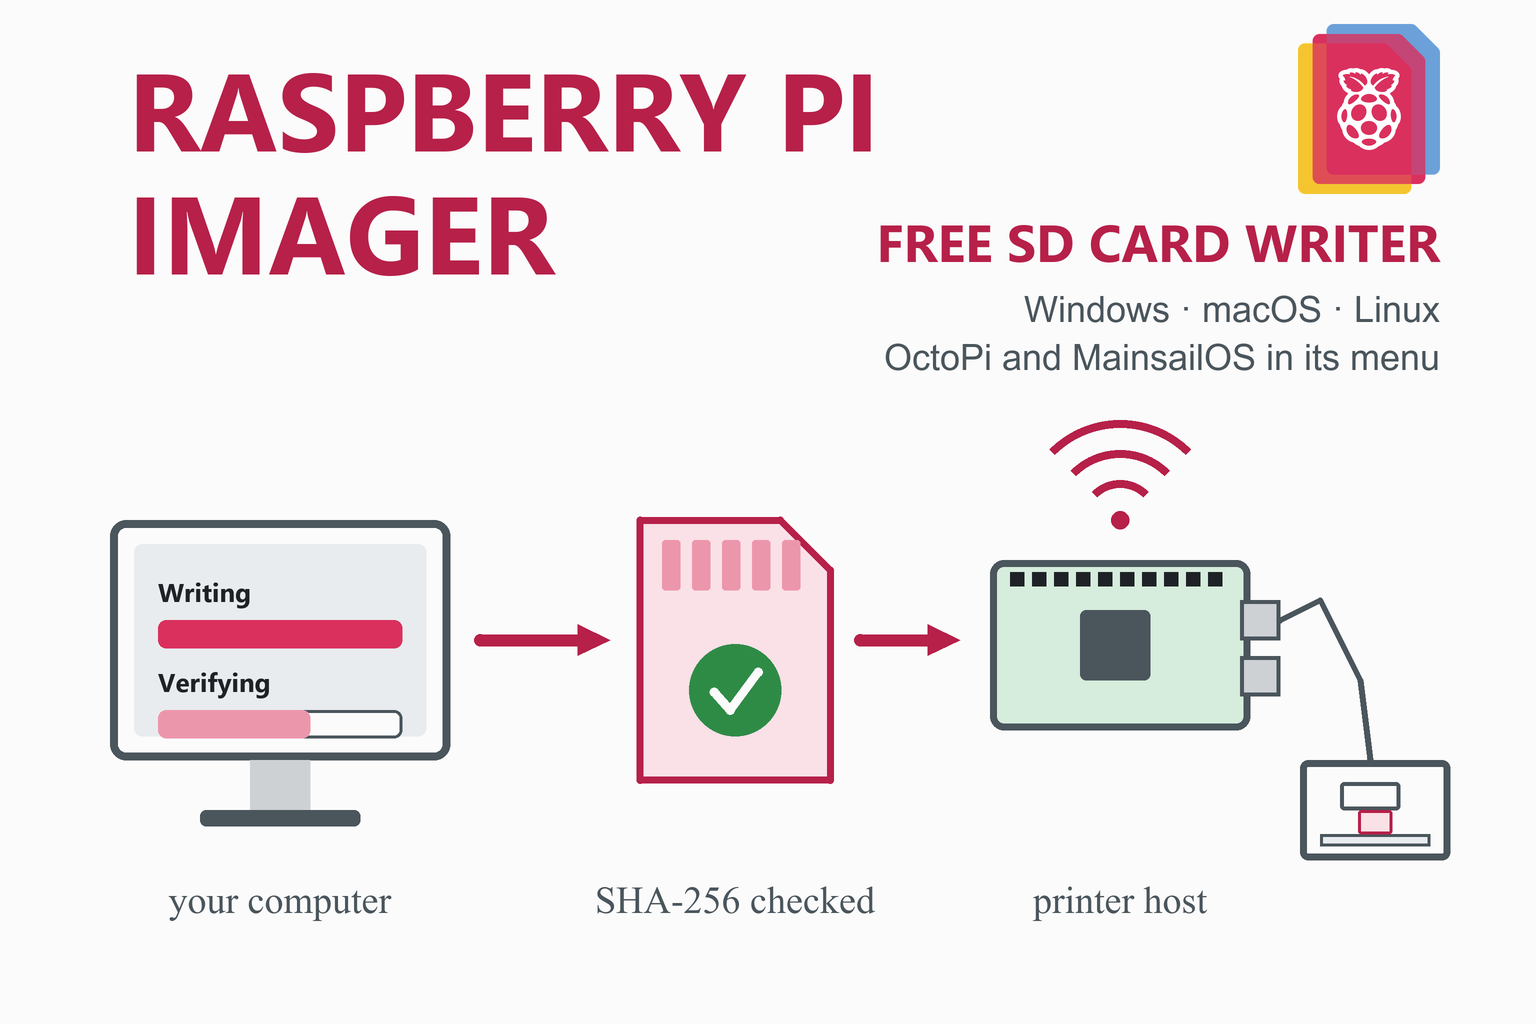
Raspberry Pi Imager is Raspberry Pi’s official tool for writing an operating system to an SD card, USB drive or SSD, and the first step to an OctoPrint or Klipper host: it downloads OctoPi or MainsailOS, writes and checks it, and sets up Wi-Fi, SSH and a hostname so the Pi can run without a screen. This Raspberry Pi Imager download page offers the newest official build with SHA-256 checksums, then explains the printer-host setup, what the verify step proves, storage choices and the command line.
Raspberry Pi Imager Download (Latest Version)
Or use the official page: Raspberry Pi software page
Previous versions
Loading the release list…
How this download box works
- It is live. Each visit asks GitHub for the newest stable release of
raspberrypi/rpi-imager(cached for ten minutes; Refresh asks again). Pre-releases are not offered, only mentioned if newer. - The main button follows your system: the installer on Windows, the disk image on macOS, the x86-64 AppImage on Linux. On a Raspberry Pi, pick an Arm file from the Linux card or use
sudo apt install rpi-imager. - Desktop or command line. desktop files and the
rpi-imagerpackages are the normal program; cli files are a command-line-only build. Sources, the checksum list and the network-installer package (embedded) are left out.
Download Safety and How to Verify the File
Imager can overwrite whole disks, so get it only from the Raspberry Pi software page or the GitHub releases of raspberrypi/rpi-imager (on Raspberry Pi OS, from apt, as the README says). A SHA-256 checksum is the file’s fingerprint: if yours matches the one shown beside the file, it is byte for byte the file stored on GitHub.
Windows (PowerShell)
Get-FileHash .\imager-v2.0.12.exe -Algorithm SHA256macOS (Terminal)
shasum -a 256 ~/Downloads/rpi-imager-v2.0.12.dmgLinux (terminal)
sha256sum Raspberry_Pi_Imager-v2.0.12-desktop-x86_64.AppImage
# or check against the release's own list, in the folder holding both files:
sha256sum -c SHA256SUMS --ignore-missing
Each release also carries a SHA256SUMS file, but it lists only the Linux files (AppImages, .deb packages and sources). For the Windows installer and the macOS disk image, compare with the value in the box above. If a value differs, delete the file and download it again.
What Is Raspberry Pi Imager?
Most Raspberry Pi boards have no built-in drive; they start from the storage you give them, usually a microSD card. Imager turns a blank card into that boot media, and the Raspberry Pi documentation recommends it for installing an operating system. In one pass it downloads an image from a list Raspberry Pi maintains online (Raspberry Pi OS, Ubuntu and many special-purpose systems, OctoPi and MainsailOS among them), writes it and customises it. Use custom writes an image file you downloaded yourself, and Erase formats a card as FAT32.
Who makes it, and the licence
Raspberry Pi Ltd develops Imager in the open on GitHub. The main code is under the Apache License 2.0; the licence file also lists the third-party parts and their own licences, among them Qt (LGPL), libarchive, libcurl, zstd and zlib. It costs nothing and needs no account; a Raspberry Pi ID is only needed if you choose the optional Raspberry Pi Connect step.
By default Imager sends anonymous usage statistics (see the FAQ); you can switch them off in App Options.
What’s New in Imager 2.0.12 and Recent Releases
When this guide was checked on 1 November 2026, the newest stable release was 2.0.12, published on 8 October 2026; the download box always shows the current one.
| Version | Date | Main changes |
|---|---|---|
| 2.0.12 | 8 Oct 2026 | The Wi-Fi passphrase itself is now written, because the derived key older versions used cannot join WPA3-only networks; passwords with a backslash or leading space now work. A cancelled write no longer reports success; truncated downloads are refused; internal eMMC is no longer shown as an SD card reader; an AppImage crash on some Linux systems is fixed. |
| 2.0.11.1 | 17 Aug 2026 | Hotfix for the Raspberry Pi Connect step and Wayland desktops (no AppImages in this release). |
| 2.0.11 | 14 Aug 2026 | Imager re-reads the customisation files after writing; exclusive drive locking on Linux and Windows; the first 32-bit Arm (armhf) AppImages and packages. |
| 2.0.10 | 19 Jun 2026 | macOS 13 becomes the minimum; Raspberry Pi Connect for organisations; Wi-Fi credentials securely erased from memory on Windows and macOS. |
| 2.0.7 | 26 Mar 2026 | A Clear button for saved customisation settings; the first macOS image was Apple-Silicon-only and was replaced on 27 March. |
| 2.0.0 | 24 Nov 2025 | The new Imager: new interface and Windows installer, new download and write engine, Raspberry Pi Connect, keyboard navigation and a command-line-only package. |
Smaller releases 2.0.2 to 2.0.6 (December 2025 to January 2026) and 2.0.8 (April 2026) sit in between; 2.0.9 and 2.0.11-rc1 were pre-releases. Imager itself tells you when a newer version is available.
System Requirements
| System | What the project says |
|---|---|
| Windows | Windows 10 or later: the installer script sets Windows 10 version 1703 as the minimum. Installing needs administrator rights. The installer is about 21 MB. |
| macOS | macOS 13 or later (since 2.0.10). One disk image, built for both Apple Silicon and Intel Macs, about 35 MB. If writing fails, allow Imager access to removable volumes in the privacy settings. |
| Linux | AppImages and .deb packages for x86-64, 64-bit and 32-bit Arm, built on Debian 12 to stay portable to current Debian, Ubuntu and Raspberry Pi OS releases. The AppImage (about 34 MB) needs fusermount from the fuse or fuse3 package. |
| Raspberry Pi OS | Install from the Raspberry Pi package archive with apt. |
| Hardware and network | A card reader (or a free USB port for a USB drive), and an internet connection to download images from Imager’s list. Without one, you can still write a local image file with Use custom. |
How to Install Raspberry Pi Imager
Windows
- Download the installer (
imager-v2.0.12.exeat the time of writing) and run it. Windows asks for administrator permission. - By default it installs to
Program Files\Raspberry Pi Ltd\Imager. The Start menu shortcut is set to run as administrator, because writing to a disk needs it.
macOS
- Download the
.dmg, open it and install Raspberry Pi Imager like any other Mac app. - When you write a card, macOS may ask for permission to read and write the storage device; allow it.
Linux
- Raspberry Pi OS: the README gives one command.
sudo apt update && sudo apt install rpi-imager - Other distributions: the documentation recommends the AppImage. Make it executable and start it; its example runs it with
sudo. Started without those rights, Imager warns you and can restart itself with them.chmod +x Raspberry_Pi_Imager-v2.0.12-desktop-x86_64.AppImage ./Raspberry_Pi_Imager-v2.0.12-desktop-x86_64.AppImage - Debian and Ubuntu package: the
.debwraps the same AppImage, installs it asrpi-imagerwith a menu entry, and pulls in the system parts it needs.sudo apt install ./rpi-imager_2.0.12-1_amd64.deb
Step by Step: Prepare a Card for OctoPi or MainsailOS
A printer host is a small computer, here a Raspberry Pi, that connects to the printer’s control board by USB and gives you a web page for sending and watching prints. It normally runs headless, with no screen or keyboard, so the card has to be right before the first boot. The steps follow the Raspberry Pi documentation and the OctoPrint and MainsailOS install pages, with Imager 2.0.12’s menu names.
1. Choose the device
Select your Raspberry Pi model and choose Next. This filters the OS list to images built for that board: 64-bit images appear only for the Pi 3, Zero 2 W, Pi 4 and Pi 5. Listed does not mean recommended. The OctoPrint download page recommends the Pi 3B, 3B+, 4B or Zero 2 and advises against the Zero and Zero W; the MainsailOS documentation recommends the Zero 2, 3 or 4 and calls the Pi 5 supported but not recommended with webcams.
2. Choose the operating system
Open Other specific-purpose OS, then 3D printing. On 1 November 2026 the category held OctoPi, OctoKlipperPi, Mainsail OS, SimplyPrint, Repetier-Server, PrintWatch OS and DuetPi; the list is maintained online and changes.
| Entry | What it is | Download | Written |
|---|---|---|---|
| OctoPi (stable) | OctoPi 1.1.0 with OctoPrint 1.11.8, a 32-bit image offered for every model from Pi 1 to Pi 5. Next steps: our OctoPrint guide. | 1.37 GB | 3.7 GB |
| MainsailOS 3.0.0, Raspberry Pi (64-bit) | Raspberry Pi OS with Klipper, Moonraker and Mainsail preinstalled, for the Pi 3, Zero 2 W, 4 and 5. Next steps: our MainsailOS guide. | 1.58 GB | 9.5 GB |
Choose the entry from this menu rather than downloading the image yourself: Imager then knows the image’s expected checksum and how to customise it (see the next two sections).
3. Choose the storage
Select the card under Storage. Keep Exclude system drives ticked, as the documentation strongly recommends, so you cannot erase your computer’s own disk; identify the card by its size, or unplug other drives. Picking a system drive anyway means typing its exact name first.
4. Customise
Fill in hostname, localisation, user, Wi-Fi and remote access (SSH), as both the OctoPrint page and the MainsailOS documentation instruct. The next section explains each one.
5. Write
- Check the Summary, choose Write, then I understand, erase and write.
- Imager downloads, writes and verifies the card; the documentation recommends letting verification finish.
- Eject the card when the Done screen appears. If your computer offers to format it, refuse: the OctoPrint page warns not to, even if prompted. The card now has a small FAT boot partition any computer can read and a Linux partition that Windows and macOS cannot.
Writing a card erases it. Imager overwrites the whole device you select, so double-check the storage choice before you confirm.
6. First boot
Put the card in the Pi, power it and give it a few minutes. Open http://octopi.local, http://mainsailos.local or your own hostname with .local; if that fails, use the IP address from your router’s device list. Our OctoPrint and MainsailOS guides take over from here.
OS Customisation for a Headless Printer Host
A headless Pi learns how to reach you only from what is on the card at its first start. The Raspberry Pi documentation says that on first boot the only remote access options are SSH or Raspberry Pi Connect, and that a headless Pi needs its Wi-Fi settings before it boots.
| Setting | What it does | Why a printer host needs it |
|---|---|---|
| Hostname | The name the Pi announces with mDNS, so other devices reach it as name.local. Letters, numbers and hyphens. | The address for your browser and slicer uploads. Suggestion: one name per printer, such as ender3 and voron. |
| Localisation | Your capital city sets the time zone, keyboard and Wi-Fi regulatory domain (the country’s rules for channels and transmit power). | On dual-band boards (Pi 3B+ and newer) Raspberry Pi OS keeps wireless off until a Wi-Fi country is set. The MainsailOS documentation adds that the time zone keeps log and timelapse timestamps right. |
| User | The admin account: lowercase letters, numbers, underscores and hyphens. | Your login for SSH and sudo. |
| Wi-Fi | Network name and password (8 to 63 characters), with options for open and hidden networks. Usually pre-filled from your computer. | Without it, only a cable gets the Pi online. The Pi 3B, Zero W and Zero 2 W have 2.4 GHz Wi-Fi only; WPA3-only networks need Imager 2.0.12 or later. |
| Remote access (SSH) | Turns on SSH with password or public-key login. | Raspberry Pi OS keeps SSH off by default; the MainsailOS documentation calls it required for logging in without a keyboard and display. |
For key login, create a key on your computer; the documentation suggests an Ed25519 key for extra security (Imager pre-fills an existing ~/.ssh/id_rsa.pub; otherwise paste your .pub file):
ssh-keygen -t ed25519How it works under the hood
Imager does not rebuild the operating system. It writes a few small text files to the card’s FAT boot partition, and the system applies them once at its first start. Each image declares the format it understands: on 1 November 2026, OctoPi used the systemd format (a firstrun.sh script that deletes itself after running) and MainsailOS used cloudinit-rpi (cloud-init files). Two consequences follow:
- Settings apply once. To change Wi-Fi or the hostname later, do it on the Pi (for example with
raspi-config) or write the card again. - Your own image files are not customised. The project’s compatibility notes say Imager 2.x treats a locally loaded image as not customisable, because it cannot know the format. With Use custom the customisation steps are skipped, so pick OctoPi or MainsailOS from the menu, or build a local manifest with the repository’s
create_local_json.pyscript. The same notes say Imager 1.x cannot customise current Raspberry Pi OS (Trixie) images at all.
Imager remembers your answers, Wi-Fi password included. On a shared computer, clear them in App Options under Saved Customisation.
Writing and Verification: What the Checks Prove
Flash memory can fail quietly: a card can accept data, report success and still hand back something different. Imager’s defence is a hash. SHA-256 turns any amount of data into a 256-bit fingerprint, and changing even one bit changes the fingerprint completely, so comparing two fingerprints reliably compares gigabytes of data. Imager 2.0.12’s source code shows three separate checks.
- Download check. While it writes, Imager hashes the uncompressed image. Imager’s OS list supplies the expected value (it does for OctoPi, MainsailOS and Raspberry Pi OS), and if the result differs Imager stops with a message that the download appears to be corrupt. This proves the data sent to the card is exactly the image the list describes.
- Read-back verification. After the write is flushed to the card, Imager reads the written area back, bypassing the computer’s caches where it can, hashes it and compares the result with the hash of what it wrote. A mismatch ends with the message that the contents of the card differ from what was written. This proves the card returned the same bits.
- Customisation check (since 2.0.11). The customisation files are written after the image check, so Imager re-reads them too. If they are missing or damaged, it reports that the card or adapter is probably failing or counterfeit and suggests trying another.
What the checks cannot prove
- Only the written area is read back: a 3.7 GB OctoPi image exercises about an eighth of a 32 GB card. Before writing, Imager also zeroes the card’s last megabyte, which exposes some fake-capacity cards, but nothing in between is checked.
- A cache can hide a fault. The developers note in the code that a card or adapter answering reads from its own memory can still pass, so not every counterfeit is caught. A reported mismatch, though, is always a real fault.
- Nothing predicts lifespan; the MainsailOS documentation warns that low-end cards tend to fail quickly in this use.
- Your own files have no expected value. With Use custom, check the publisher’s checksum yourself first.
Skip verification saves a few minutes, but on a card that will run a printer for months they are well spent. For a second card, Imager reuses its cached download after checking it against the expected hash.
SD Card, USB Drive or SSD: What the Official Docs Say
- Capacity. Raspberry Pi recommends at least 8 GB for Raspberry Pi OS Lite and 32 GB for the desktop versions; other systems may differ. The MainsailOS documentation asks for 16 GB minimum and 32 GB or more recommended (its image alone takes 9.5 GB). The OctoPrint page names no size; OctoPi takes 3.7 GB.
- Quality. Raspberry Pi says faster storage makes the Pi run more smoothly and suggests its official microSD card if you are unsure; the MainsailOS documentation strongly recommends class A1 or better.
- Limits. Cards must be under 2 TB (the MBR partition limit); the original Zero, the first Pi and early Pi 2 boards boot only from a boot partition of 256 GB or less.
- USB drives and SSDs. Imager writes them like cards. The Pi 3B+ and Zero 2 W boot from USB out of the box, the Pi 4 and newer when the boot order includes USB (early Pi 4 boards may need a bootloader update). Remove the SD card, which is tried first. Hard disks typically need a powered hub, and a Pi 5 on a 3 A supply limits USB devices to 600 mA.
- NVMe on a Pi 5 needs an M.2 adapter (Raspberry Pi recommends its M.2 HAT+ or HAT+ Compact) and a boot order that includes NVMe, set in
raspi-configor with a bootloader card from Imager’s Misc utility images. - No other computer? A Pi 4, 5, 400, 500 or 500+ can run Network Install: with a screen, keyboard and wired internet it loads Imager itself.
The Command-Line Version
Imager can also run without a window, for writing cards from a script or on a headless Linux machine:
- Any desktop build accepts
--cli. On Windows the installer addsrpi-imager-cli.cmd, which runsrpi-imager.exe --cliand waits; use it from an administrator prompt. - The cli AppImages and the
rpi-imager-clipackage (installed asrpi-imager-cli, needing only Qt Core) start in command-line mode, so leave out--cli. The package conflicts with the desktop one.
The image can be a local file, compressed or not, or an https address; the destination is the whole device, such as /dev/mmcblk0 or /dev/sdb:
sudo rpi-imager --cli ~/Downloads/2026-05-06-MainsailOS-raspberry_pi-arm64-trixie-3.0.0.img.xz /dev/sdbIt refuses any destination that is not a removable drive and lists the removable drives it found, a safe way to find the right name. The options in version 2.0.12:
| Option | What it does |
|---|---|
--sha256 <hash> | Checks the image against an expected SHA-256 and stops with an error if it differs. It is compared with the hash of the uncompressed image as written, so give the hash of the .img, not of the .xz or .zip you downloaded. |
--disable-verify | Skips the read-back verification. |
--disable-eject | Leaves the card mounted after writing. |
--first-run-script <file> | Adds your own firstrun.sh (for images using the systemd format, such as OctoPi). |
--cloudinit-userdata <file>, --cloudinit-networkconfig <file> | Adds cloud-init files (for cloud-init images, such as MainsailOS). |
--cache-file <file> | Keeps a copy of a downloaded image; needs --sha256. |
--enable-writing-system-drives | Lifts the removable-only rule. The program’s own help says to use it only if you know what you are doing. |
--quiet, --debug, --log-file <path> | Less output, more output, or a log file. |
Note that there are no switches for hostname, user or Wi-Fi: on the command line you supply the first-run script or cloud-init files yourself, in the format the image expects.
OctoPi, MainsailOS or Raspberry Pi OS Lite?
Imager writes all three; the choice depends on the printer software you want. The figures come from Imager’s OS list on 1 November 2026.
| OctoPi (stable) | MainsailOS 3.0.0 (64-bit) | Raspberry Pi OS Lite (64-bit) | |
|---|---|---|---|
| Printer software | OctoPrint 1.11.8, ready to use | Klipper, Moonraker and Mainsail, ready to configure | None: you install it yourself |
| Boards in Imager | Pi 1 to Pi 5 (32-bit image) | Pi 3, Zero 2 W, 4, 5 | Pi 3, Zero 2 W, 4, 400, 5 |
| Download / written | 1.37 GB / 3.7 GB | 1.58 GB / 9.5 GB | 0.55 GB / 3.1 GB |
| Customisation format | systemd (firstrun.sh) | cloudinit-rpi | cloudinit-rpi |
| Our guide | OctoPrint and OctoPi | MainsailOS | Klipper install guide (KIAUH route) |
For a headless Raspberry Pi OS install, the documentation recommends the Lite version, since no desktop is needed. For the firmware on the printer’s own control board, see our Klipper install guide or, for printers that keep Marlin, our Marlin firmware guide.
Pros and Cons
Strengths
- Official, free and open source (Apache 2.0), no account needed.
- OctoPi and MainsailOS in the menu, with expected checksums.
- Customisation makes a headless host reachable on first boot.
- Read-back verification; system drives hidden by default.
- A command-line build and files for x86-64 and Arm.
Limits
- No customisation for image files you load yourself.
- Anonymous statistics on by default (easy to switch off).
- No hostname or Wi-Fi switches on the command line.
- Verification cannot unmask every counterfeit card.
- Older versions lack fixes such as WPA3 support.
Troubleshooting
| Problem | What to try |
|---|---|
| The card does not appear under Storage | Check the reader and the card. If Imager says every device is hidden by the Exclude system drives filter or is read-only, the card is not being seen as a writable removable drive. Imager suggests running with administrator rights when it cannot list devices. |
| Writing fails on a Mac | Allow Raspberry Pi Imager access to removable volumes in the privacy settings, or give it full disk access, as Imager’s own error message says. |
| “Verifying write failed” | The card returned different data from what was written. Try another card or reader; do not use that card for a printer host. |
| “Download appears to be corrupt” | The image did not match its expected checksum. Check your connection and try again; Imager removes a corrupt cached copy itself. |
| The Pi never joins Wi-Fi | Check the Wi-Fi country, the band (2.4 GHz only on Pi 3B and Zero 2 W) and the password. For WPA3-only networks or passwords with a backslash, rewrite the card with Imager 2.0.12 or later. |
| The Linux AppImage does not start | Make it executable (chmod +x) and install the fuse or fuse3 package. Version 2.0.12 fixed a start-up crash on some systems and bundles libraries missing on some Ubuntu derivatives. |
Frequently Asked Questions
Is Raspberry Pi Imager free?
Yes. Raspberry Pi Ltd publishes it free, with the main code open source under the Apache License 2.0 (bundled parts such as Qt keep their own licences). No account is needed; a Raspberry Pi ID is only for the optional Raspberry Pi Connect step.
Is Raspberry Pi Imager safe to download?
Get it only from the Raspberry Pi software page, the GitHub releases of raspberrypi/rpi-imager or, on Raspberry Pi OS, apt. The box on this page links only to the official GitHub release and shows each file’s SHA-256 checksum so you can confirm your copy.
Which file should I download?
Windows: the .exe. Mac: the .dmg (macOS 13 or later). Linux PC: the x86-64 desktop AppImage, or the .deb on Debian and Ubuntu. Raspberry Pi OS: sudo apt install rpi-imager. Files with cli in the name are the command-line-only build.
Can Raspberry Pi Imager install OctoPi and MainsailOS?
Yes, under Other specific-purpose OS, then 3D printing (on 1 November 2026: OctoPi 1.1.0 with OctoPrint 1.11.8, and MainsailOS 3.0.0). Choosing them from the menu lets Imager check the expected checksum and apply your customisation.
Why should I fill in the customisation settings for a printer host?
A printer host usually runs without a screen, so it must know how to join your network on its first start. The settings give it a hostname to reach it by, the Wi-Fi details, a Wi-Fi country (dual-band Raspberry Pi boards keep wireless off until one is set), a user account and SSH access, which Raspberry Pi OS keeps off by default.
What does the verify step actually check?
It reads the written area back and compares its SHA-256 with that of the data written; Imager also checks the image against the OS list’s expected hash and, since 2.0.11, re-reads the customisation files. A match proves the card returned the same data, not that unused space is sound or that the card will last.
My computer wants to format the card after writing. Should I?
No. The OctoPrint download page warns not to, even if prompted. Windows offers it because it cannot read the card’s Linux partition; formatting would erase the installation.
Why are the customisation steps missing for an image I downloaded myself?
The project’s compatibility notes say Imager 2.x treats a locally loaded image as not customisable, because it cannot know which customisation format that image expects. Choose the system from Imager’s own menu instead, or build a local manifest with the create_local_json.py script from the Imager repository.
Can Imager write to a USB drive or SSD?
Yes, the same way as SD cards. Booting from them depends on the model: the Pi 3B+ and Zero 2 W boot from USB out of the box, and the Pi 4 and newer when the bootloader’s boot order includes USB (or NVMe on a Pi 5 with an M.2 HAT+).
Does Raspberry Pi Imager collect data?
By default it sends anonymous statistics: which OS you chose, the Imager version and your computer’s OS version, architecture and locale, stored as daily counters according to the README. Switch it off in App Options under Enable anonymous statistics (telemetry), or start Imager with --disable-telemetry.
More printer-host and slicer guides: OctoPrint and OctoPi · MainsailOS · Klipper install guide · Spoolman filament tracker · Marlin firmware · Orca Slicer · PrusaSlicer · Best 3D printer slicers · Engineering calculators